
Behind the Build: What the Paver Patio Installation Process Really Looks Like
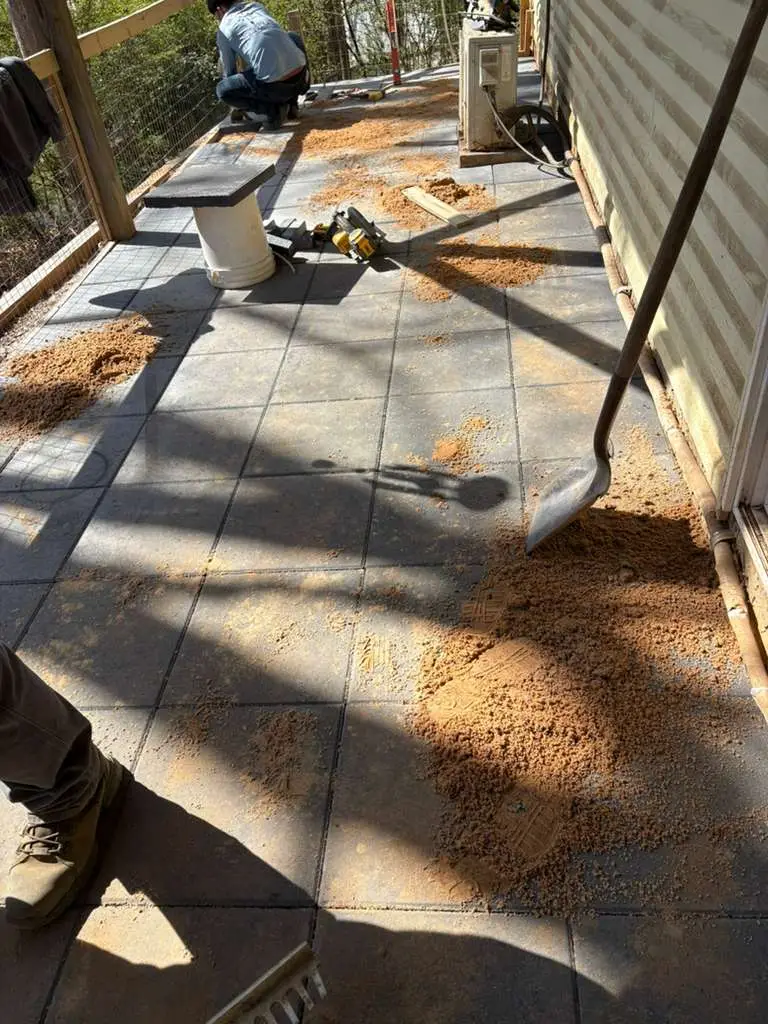
Most homeowners see the finished product — a clean, level, beautifully laid paver patio — and have little idea how much skilled work went into getting it there. A professional paver patio installation is a multi-step process that requires precise planning, proper materials, and experienced hands at every stage. Get any one of those steps wrong, and the finished surface will shift, crack, settle unevenly, or fail prematurely — no matter how good the pavers themselves are. At Bernardo’s Landscaping LLC, we’ve built paver patios across Asheville, NC and the surrounding 30-mile area for over 16 years, and we believe informed homeowners make better decisions and get better results. Here’s an honest look at what a professional paver patio installation actually involves from start to finish.
Planning and Layout Come Before Anything Else
Every successful paver patio installation starts well before any ground is broken — it starts with a clear plan that accounts for how the space will actually be used.
- Understanding the homeowner’s vision. The size, shape, and layout of the patio are shaped by how it will be used — entertaining, dining, relaxing, or all three. A patio designed around real use patterns delivers far more long-term satisfaction than one sized and placed arbitrarily.
- Measuring and marking the footprint. The patio area is measured precisely and marked on the ground before excavation begins, accounting for slopes, drainage patterns, existing structures, and foundation clearance requirements.
- Selecting paver material and pattern. Color, texture, size, and laying pattern are all decided during the planning phase so materials can be ordered correctly and the crew knows exactly what the finished surface should look like before a single paver goes down.
- Confirming drainage direction. Every patio must slope slightly away from the home — typically a minimum of one-quarter inch per foot — to direct water away from the foundation. This slope is planned deliberately and built into the grading from the start.
Excavation and Site Preparation Set the Foundation for Everything
Site preparation is where many DIY and low-quality installations go wrong — and where professional installations earn their long-term performance.
- Excavating to the correct depth. The ground is excavated to accommodate the gravel base, bedding sand, and paver thickness — typically six to eight inches below the finished surface level, varying based on soil conditions and local frost depth.
- Grading for drainage. Excavated soil is removed and the subgrade is graded to the planned slope direction, ensuring the entire base layer drains correctly from day one.
- Compacting the subgrade. The exposed ground is compacted with a plate compactor before any base material is added. Skipping this step allows uneven settling over time, causing pavers to shift and the surface to develop low spots.
- Addressing soil issues before they’re buried. Poor drainage, soft spots, or unstable soil discovered during excavation are corrected at this stage — not covered over. In Western NC’s clay-heavy soils, this step is especially critical for long-term performance.
The Gravel Base Is the Structural Backbone of the Patio
The gravel base determines how long the finished surface holds up — and it deserves as much attention as the pavers themselves.
- Crushed stone is spread and compacted in layers. Compactable crushed gravel is spread across the excavated area in two-to-three-inch lifts and compacted thoroughly between each layer, ensuring the base reaches maximum density throughout its full depth.
- Base depth is verified across the entire area. Once fully compacted, the base depth is checked at multiple points to confirm consistency. Low spots in the base become low spots in the finished patio, so uniformity here is non-negotiable.
- Edge restraint stakes are set into the base. Perimeter stakes that anchor the edge restraints are driven into the compacted base along the patio’s outer boundary before bedding sand is added, positioning them correctly before the surface layer begins.
Bedding Sand Creates the Precise, Level Surface the Pavers Rest On
The bedding sand layer is one of the most detail-oriented parts of the installation — and it’s what makes a professional paver surface look and feel as flat and consistent as it does.
- Coarse sand is spread over the compacted base. Angular coarse sand — not fine play sand — is used for the bedding layer. Fine sand compresses unevenly and doesn’t support pavers with the consistency that angular sand provides.
- Sand is screeded to a precise, uniform depth. Screed rails are set at the planned finished height, and the sand is leveled with a screed board to a consistent one-inch depth across the entire patio area. This is what creates the even, flat surface that defines a quality installation.
- The screeded surface is not disturbed before paving. Once screeded, the sand stays undisturbed until pavers are laid. Footprints or tool marks at this stage create inconsistencies that appear in the finished surface.
Paver Laying Is Where Craftsmanship Becomes Visible
With the base prepared and the sand screeded, the actual paver laying begins — and this is where the skill of the installation crew shows most clearly.
- Each paver is placed carefully by hand. Pavers are set onto the screeded sand without sliding — sliding disturbs the sand beneath and creates uneven spots. Each piece is placed snugly against its neighbor with consistent, tight joints throughout.
- Pattern alignment is checked continuously. Whether the layout is a running bond, herringbone, or mixed pattern, alignment is verified frequently to ensure the pattern stays true across the entire surface.
- Cuts are made precisely where needed. Wherever the patio meets a wall, step, drain, or irregular edge, pavers are cut using a wet saw or paver splitter to achieve clean, tight fits without gaps or rough lines.
- The surface is leveled as work progresses. A straightedge and level are used throughout installation to catch and correct any pavers that sit higher or lower than their neighbors — addressing discrepancies immediately rather than after the full surface is laid.
Compaction and Joint Sand Lock the Installation in Place
Once all pavers are laid, a final compaction process and joint sand application complete the structural work of the installation.
- The surface is compacted with a plate compactor. Running a plate compactor — fitted with a protective pad — over the installed pavers seats them firmly and evenly into the bedding sand, eliminating minor height variations that remain after hand laying.
- Polymeric joint sand is swept into the joints. Polymeric sand is swept across the surface and worked into the joints with a push broom, with multiple passes to ensure full filling from top to bottom.
- Excess sand is cleared from all paver faces. All polymeric sand is removed from the paver surfaces before water activation. Sand left on the face when water is applied can leave a permanent haze on the surface.
- Water activates the polymeric binder. A light, even misting activates the binding agents in the sand, hardening it in the joints. This locks the pavers together, inhibits weed growth, and resists washout during Western NC’s heavy rain events.
Edge Restraints and Final Inspection Complete the Job
The last structural element secures the perimeter and ensures the entire installation stays contained and stable long after the crew leaves.
- Edge restraints are fastened along the perimeter. Rigid restraints secured to the pre-set stakes create a physical barrier that prevents the outer pavers from spreading outward over time under traffic and soil pressure.
- The finished surface is inspected thoroughly. The completed patio is walked and visually reviewed for alignment, levelness, joint consistency, and overall appearance before the job is signed off.
- The site is fully cleaned. All materials, cut pieces, tools, and debris are removed from the property. Surrounding lawn, garden beds, and hardscape surfaces are cleared of sand, gravel, and dust from the installation.
- The homeowner walks the project. Before the crew departs, the homeowner is walked through the completed installation, given maintenance and sealing guidance, and any questions are answered before the job is considered complete.
Why the Process Matters as Much as the Product
Understanding what goes into a professional paver patio installation helps homeowners recognize the difference between a thorough installation and one that cuts corners. A patio built correctly — with proper excavation, compacted base layers, accurate screeding, and polymeric joint sand — holds its appearance and structural integrity for decades. One built without those steps may look identical on day one but begin showing problems within just a few years.
The process is the product. And at Bernardo’s Landscaping LLC, every phase described here is carried out on every patio we build — because doing it right from the ground up is the only approach we know.
Build Your Paver Patio Right With Bernardo’s Landscaping LLC
At Bernardo’s Landscaping LLC, we build paver patios for homeowners across Asheville, NC and the surrounding 30-mile area the right way — every phase, every time. Our licensed and insured team brings over 16 years of local experience to every installation, and we stand behind our work with the craftsmanship and attention to detail your property deserves.
Contact us today to schedule your free consultation and get started on a paver patio built to last.
Recent Post

Professional Landscaping Solutions
From design and installation to long-term maintenance, our team delivers reliable service with precision and care.